

How Do I Make a DIY Nail Board for My Dog?

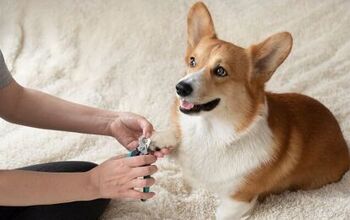
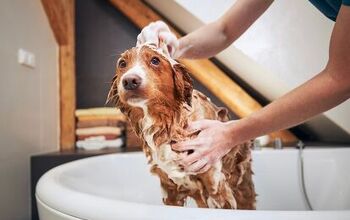
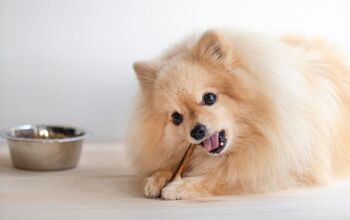
Maintaining your dog’s nails is essential to their overall health and well-being, but it can be challenging if your dog is uncomfortable with the nail clippers and other standard tools. While you could pay to bring your dog to the veterinarian each time a trim is needed, there are other options.
Our pup Lucifer is nervous anytime someone touches his paws as a result of injuries to his front legs as a young rescue pup. This means that nail trims are a source of extreme anxiety.
While we continue working on counterconditioning and helping him overcome his fears, we knew we needed to find a solution for the here and now. Enter the DIY nail board – a simple, budget-friendly alternative to that dreaded nail trim. The board is an oversized nail file that you then train your dog to use at their own pace. It’s a great way to build your dog’s confidence and strengthen your bond while keeping their nails in shape.
Can I Use a Regular Nail File on My Dog’s Nails?
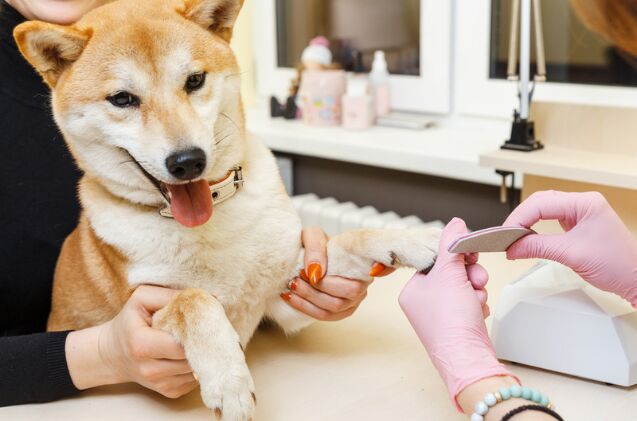
While you could use a regular human nail file on your dog’s nails, it likely isn’t going to do the job. A dog’s nails are far stronger than our fingernails. Most emery boards and standard nail files will fail to make a dent in their surface, with many falling apart from the wear. If you want a nail file that can be used on your pet, I recommend purchasing a product specifically for dogs, like the Coastal Pet Safari Dog Diamond Nail File.
What is a Scratch Board for Dogs?
A scratch board is like a nail file; it provides a coarse surface that will help wear your dog’s nails down. The difference is that it is larger in size. Rather than bringing the file to a dog’s nails, the dog is trained to paw at the board and file their nails down. This means they are in complete control over when their nails touch the surface, which is much more comfortable for dogs that may suffer from stress or anxiety. It also means no one will need to handle their paws during nail care.
Do Scratch Boards Work for Dog Nails?
Yes! If your dog is taught to use a scratch board, they are a highly effective way of filing down their nails. This works much like how their ancestor’s nails would be worn down in the wild. As a dog runs and walks on rough surfaces or digs through coarse dirt, the tiny particles of dirt and stone wear away at the nail.
Domesticated dogs may spend some time outdoors running around or digging, but many don’t engage in these behaviors as much as they would in the wild. They aren’t foraging for food daily or running to avoid predators and hunt down prey. This is why domestic dogs need regular nail maintenance, but wild dogs like wolves and coyotes function fine without this additional level of care.
As your dog digs at or scratches the board, their nails run along the coarse surface. This allows you to fast-track the wear and tear they would naturally experience.
Where Do I Get a Dog Scratch Board?
You can purchase a nail board online or at your local pet store, depending on your preferences and budget. You can also DIY your own nail board. Some of the unique commercially made scratch boards you may want to consider for your dog include:
- Skuun Dog Scratch Pad for Nails: This is a veterinarian-approved board with an anti-slip surface and treat pocket.
- Zenly Paws Dog Nail File Toy: It combines a scratch pad with a food puzzle toy to make training your dog to file their nails easier and more enjoyable.
- LovIntry M-Shaped Dog Scratch Pad for Nails: The unique M-shaped design makes it easier to file the nails further back on your dog’s paws if they only file their front nails on a flat board.
How Do I Make a DIY Nail Board for Dogs?
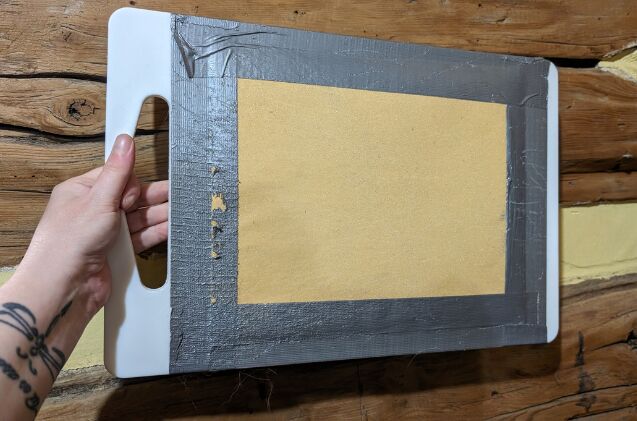
If you want to save money or simply enjoy DIY projects and crafts, you may wish to make a DIY nail board. I was surprised at just how easy this is, making it a nail care alternative that is truly accessible for all dog parents.
The supplies needed for this project are minimal and accessible at most dollar stores or home improvement stores, making it a budget-friendly solution. This includes the following:
- A flat board such as a plastic or wood cutting board
- Duct tape and a strong glue
- 120 or 80-grit sandpaper
To select a board that is the correct size, you want to choose one that is a couple of inches wider than your dog’s paw. If you have a large or giant breed dog, you may need to consider purchasing a wooden board at a home improvement store. For smaller dogs, like our pup Lucifer, you can use a cutting board, which also offers the bonus of a handle to make it easy to hold.
Cut your sandpaper so that it is slightly smaller than the surface of your board. Using strong glue, such as super glue or wood glue, coat the back of the sandpaper before placing it on the board. Smooth it out to remove any creases, wrinkles, or bubbles before putting something heavy on top and allowing it to dry completely.
Take pieces of duct tape slightly longer than each side of your sandpaper and place them overlapping the edge slightly to secure it. This will prevent your dog from pulling up the edges of the sandpaper during use.
You are now ready to get started with the training process!
How to Train Your Dog to Use a Nail Board Step-By-Step
The first time you place your dog’s new nail board in front of them, they will likely have no idea what to do. Some dogs may even appear nervous about this new addition to “their space.” Luckily, the training process is straightforward and, with the help of your dog’s favorite training treats, can be a fun bonding experience for you and your pup.
Step 1: Introduce the Nail Board
Anytime you teach your dog to use a new tool, you must start by introducing it and allowing them to feel comfortable just being around it. To begin, you can either place it on the floor or hold it if you plan on holding it at an angle during use (my preferred approach with Lucifer). When your dog comes over to sniff or check it out, reward them with a treat. Encouraging them to step on it, touch it, and interact with it, but don’t force the process.
For some dogs, this will only take 5 minutes. However, others may need a day or two before they no longer show nervousness about the new addition to their living area. If your dog is naturally nervous around new things, be patient. Rushing through this first step will make everything else much more difficult!
Step 2: Encourage Your Dog to Dig or Scratch
The approach in this step will vary depending on your dog. For some dogs, you may find it easiest to start by taking their paw and placing it on the board, praising and rewarding them for touching it. However, this isn't necessary if your dog is opposed to having their paws handled.
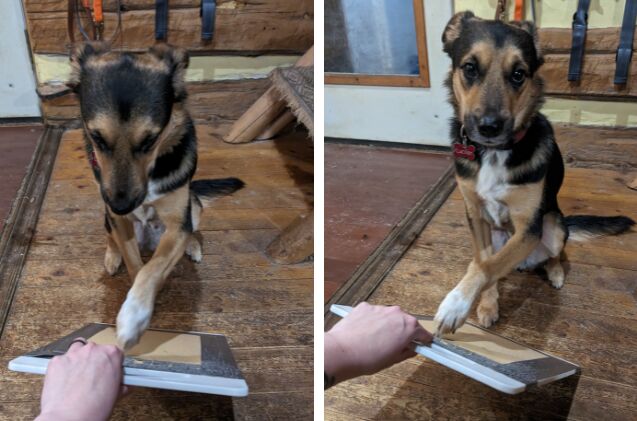
I found the easiest way to get started with Lucifer was to take one of his favorite treats in my hand, allowing him to smell it and acknowledge it was there. I then placed that hand beneath the board while holding the handle with the other hand. As he sniffed around the board, trying to get at the treat, I tilted it slightly to ensure it blocked access. Eventually, he started digging at the board to get the treat. Each time he did this, I would praise him and give him his reward (the same treat I was holding underneath that he had worked to get at).
Stay consistent. Every time your dog touches the board, even if just for a second, praise and reward them. In time, they realize that scratching it will earn them a treat.
Step 3: Add a Command
Is your dog confidently making the connection between touching the board and being rewarded? Now, it’s time to add a command to the equation. The most common verbal commands are “scratch” or “file.”
When your dog comes over toward the scratch board, give the command. Praise and reward them for following through with the requested action. Repeat this process until your dog responds by scratching without hesitation each time you give the command.
Step 4: Keep Up the Good Work
The biggest mistake I often see when training a dog is that, once they show they confidently know the command, you move on to something else and forget about it. Not only is this not going to maintain your dog’s nails, but it’s also going to increase the likelihood that they forget the work you have just done. Incorporate the scratch board into your daily schedule. Staying on top of everything will only take a couple of minutes each day.
We do a “scratch session” every day before dinner. Not only does this mean I am more likely to remember to do it by having a set time, but it also creates a routine he can follow (and dogs love routines).
Bonus: Add the Back Paws
Many dog parents will leave scratch board sessions for just the front paws, as the back nails often need less maintenance. Your regular veterinary appointments may be all that is required to keep up with them. However, if you have a dog that needs to have their back nails addressed, you may wish to take their training to the next level.
For Lucifer, we used a couch to help with this process. I would call him over, having him place his front legs on the couch (or on my lap) while positioning the board in front of his back paws at an angle. As I hyped him up (he’s a high-energy dog), he would try to climb up. During this process, his back paws would scratch at the board, prompting praise and a reward. In the beginning, this can be confusing as they learn to make the connection between the scratching action and the reward. Be consistent!
In time, you can incorporate a command just as you did with the front legs. Depending on your dog’s personality and trainability, you may choose to use a different command to avoid confusion. You can use the same command for both if you feel confident that they will understand the difference based on the board’s location. We use “scratch” for both front and back legs.
Final Thoughts: Nail Boards for Dogs
A nail board is an excellent alternative for dogs who are opposed to having their nails trimmed, especially those sensitive to having their paws handled. This is not only more comfortable for your dog, but it can prevent bites and other injuries that occur from trying to force an anxious or nervous dog through the standard nail-trimming process.
Scratch boards can be purchased online through retailers like Amazon or at many smaller or boutique pet stores. Alternatively, you can create your own nail board using supplies readily available at your local dollar store or home improvement store.
Teaching your pet to use a nail board will take time, patience, and consistency. However, you can turn this into a fun bonding opportunity for you and your dog by focusing on positive reinforcement and offering their favorite treats. In time, you will have an easy-to-use solution to effectively maintain your dog’s nails.
Join the PetGuide community. Get the latest pet news and product recommendations by subscribing to our newsletter here.
Britt Kascjak is a proud pet mom, sharing her heart (and her home) with her “pack” which includes her husband John, their 2 dogs – Indiana and Lucifer – and their 2 cats – Pippen and Jinx. She has been active in the animal rescue community for over 15 years, volunteering, fostering and advocating for organizations across Canada and the US. In her free time, she enjoys traveling around the country camping, hiking, and canoeing with her pets.
More by Britt