

DIY Vintage Crate Dog And Cat Beds

I’ve been on a DIY kinda kick lately. Usually, I bake a batch of dog treats and that usually quells my handy urges. But with the weather being so mild, I felt it was time to take it up a notch and get busy with a project that was outside of my comfort zone. These DIY Vintage Crate Dog and Cat beds fit perfectly into my décor. However, my sewing skills are a bit shaking – but luckily, I have a friend who is a whiz with the sewing machine and was willing to help me out.
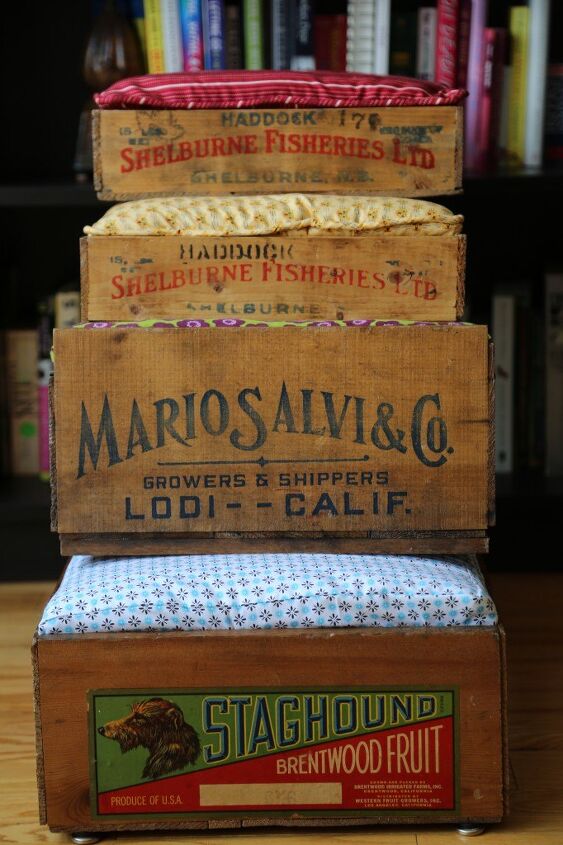
The idea of making a crate bed was to capture a vintage style look that would match my living or bedroom. I think these beds would look good in any home, not matter what style you have. I picked up some funky material that features cool patterns… pus, it was all on sale and I love to save money.
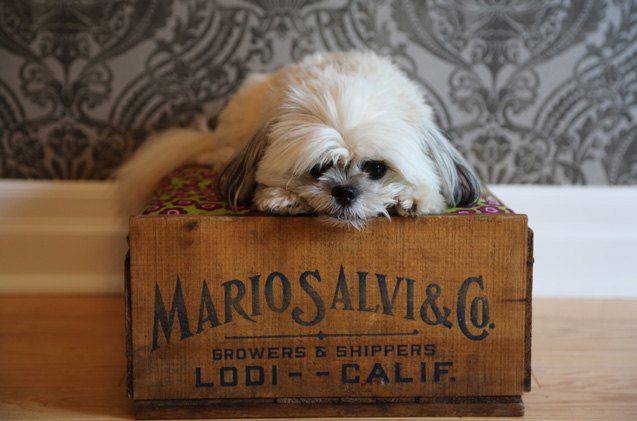
For the crates, I was lucky enough to find an out-of-the-way business on Kijiji that had hundreds of crates to choose from. I picked two larger crates for the dogs, and some smaller fish crates for the cats. Because Oscar is only 10 pounds, a smaller shipping crate was the perfect size. There were large crates available, but they were a little pricier.
Here’s what you’ll have to do to make a Vintage Crate Dog and Cat bed of your very own.
- A crate big enough to comfortably fit your pet
- Varathane (water based)
- Paint rollers
- Small brush
- Approximately 1 yard of cotton fabric per crate
- A zipper (the size should be a bit smaller than the length of your crate)
- Foam
- Quilting batting (optional)
- Felt tabs (optional)
- Piping (Optional)
Directions (Crate)
- Wash out crate and leave to dry.
- Pour varathane into paint tray. Dip paint roller into varathane and apply thin layer onto crate. Be sure the roller has a small amount of varathane on it when applying – too much can cause unsightly drip marks on the crate. Start rolling on the side of the crate, and then move to the inside and bottom. Get into small corners and wipe off drips with a small paint brush. Be sure to do this on the grass or pavement, using a drop sheet or old bed sheet to cover the surface you’re working on.
- Let dry overnight. Reapply if necessary.
I found the crates for sale on Kijiji, but you can use your local online listings or yard/antique sales. The varathane gave it a glossy sheen without taking away the vintage color of the crates. You can use a stain if you’d like your dog bed to be darker.
Directions (Cushion Cover)
- You’ll need about a yard of fabric per crate, depending on the size. For these crates, with measurements of 17.5 inches by 5.5 inches, a yard was enough to cover the foam.
- Measure your foam for both length and width. The higher your crate, the denser your foam will have to be.
- Put the crate on top of the foam. Using a dark marker, trace the bottom of the crate on the foam for the exact size.
- Using an electric knife, carve foam along the trace lines. Once it’s cut, fit the foam into the crate – if it’s too big, trim along the edges. (Optional: Wrap and glue quilt batting to foam).
- Layout the fabric on a flat surface and make sure the pattern reads in the direction. Take measurements from inside the crate and include seam allowances. Mark the fabric using the measurements. You’ll need to cut fabric for the top and the bottom of the cushion, as well as the sides (band).
- Cut fabric along the measurement lines.
- For the bands of the cushion cover, measure the thickness of the foam and leave room for seam allowances.
- Sew the bands together.
- Sew the entire length of the band on the top side of the cushion fabric and cut off any extra pieces (if necessary).
- Sew the zipper along the length of the fabric.
- Sew the bottom cushion fabric to the band.
- Fold foam in half and place in cushion cover.
- If you have hardwood flooring, place felt tabs on the bottom corners of the crate to prevent scratches.
Make sure the fabric is 100 percent cotton, so you can unzip it and throw it into the washing machine.
Optional Piping (You’ll need to buy extra fabric for the piping, or use the fabric you have left over):
- For piping, cut a 2-inch strip of fabric on the bias.
- Sew piping fabric pieces together from end to end. Trim where needed.
- Cut piping to fit the length of the fabric.
- Sew the piping into the fabric.
- Sew piping to the topside of fabric cushion. Repeat with the bottom piece of fabric.
I picked up the paint roller, tray, brush and felt tabs at the dollar store. I reused the foam from an old couch cushion and looked around fabric stores for sales. The crates turned out to be the most expensive item on my list, but since I bought four, I got a great deal – $15 per crate. With a little sale sleuthing and bartering skills, you can save yourself some big bucks on this hip DIY dog/cat bed (and perhaps start an Etsy side business!).
Amy Tokic, Editor of PetGuide.com, is a passionate animal lover and proud pet parent of Oscar, a Shih Tzu/Chihuahua cross, and Zed, a Japanese Chin. Her love of animals began in kindergarten, when she brought her stuffed dog Snoopy into class with her every day. Now, she writes about her adventures in pet ownership and tirelessly researches products, news and health related issues she can share with other animal enthusiasts. In her free time, Amy loves perusing used book and record stores, obsessing over the latest pet products available and chasing squirrels with wild abandon (a habit attributed to spending too much time with her pooches).
More by Amy Tokic